No Bake Chocolate Biscuit Layer Cake Recipe
The No Bake Chocolate Biscuit Layer Cake is a delightful dessert that requires no oven and is perfect for any occasion. I’ve made this decadent treat countless times — experimenting with variations and serving it to guests who always rave about it.
This recipe is rich, creamy, and incredibly simple to prepare — ideal for chocolate lovers and beginners alike.
Why You’ll Love This No Bake Cake
This cake stands out for its simplicity, versatility, and indulgent flavor. No baking is needed — just layering biscuits and a luscious chocolate cream. It’s a fun, foolproof process that delivers beautiful results every time.
Here’s what makes it special:
-
Easy, no-bake method — perfect for beginners.
-
Silky, rich chocolate cream.
-
Crisp biscuit layers for texture.
-
Great for make-ahead desserts.
Step-by-Step No Bake Cake Guide
Ingredients
For the Chocolate Pudding Layer:
-
1 liter milk
-
1 cup sugar
-
5 tablespoons cocoa powder
-
2 tablespoons cornstarch
-
2 tablespoons flour
-
200 g dark or milk chocolate
-
1 tablespoon butter
For the Biscuit Layers:
-
300 g plain tea biscuits or rectangular cookies
Instructions
-
Prepare the Chocolate Cream
In a saucepan, whisk milk, sugar, cocoa powder, cornstarch, and flour until smooth.
Cook over medium heat, stirring constantly, until it thickens to a pudding consistency. -
Add Chocolate and Butter
Remove from heat. Add chopped chocolate and butter. Stir until melted and silky smooth. -
Layer the Cake
-
Pour a thin layer of chocolate mixture into a square or rectangular dish.
-
Add a single layer of biscuits, side by side.
-
Repeat layers, alternating chocolate and biscuits, ending with chocolate on top.
-
-
Chill and Set
Lightly tap the pan to release air bubbles and smooth the top.
Chill in the refrigerator for at least 4 hours, or until firm. -
Serve and Enjoy
Slice and serve cold for the best texture and taste.
Rich, creamy, and chocolatey — this dessert melts in your mouth!
Essential Ingredients Overview
| Ingredient | Quantity | Purpose |
|---|---|---|
| Digestive biscuits | 300 g | Crispy layers |
| Butter | 150 g | Helps the base set |
| Cocoa powder | 3 tbsp | Deep chocolate flavor |
| Sweetened condensed milk | 400 g | Creamy sweetness |
| Vanilla extract | 1 tsp | Enhances aroma |
Layering the Cake
-
Prepare the Biscuit Base:
Crush biscuits finely and mix with melted butter.
Press into the base of your cake tin and refrigerate for 30 minutes. -
Add the Chocolate Cream:
Spread a thick layer of chocolate cream over the biscuit base.
Add another layer of biscuits and repeat until all ingredients are used. -
Final Layer:
Finish with chocolate cream on top and smooth the surface.
Decorating Ideas
Chocolate Drizzle
-
Melt dark chocolate with a splash of cream.
-
Drizzle over the top for a glossy finish.
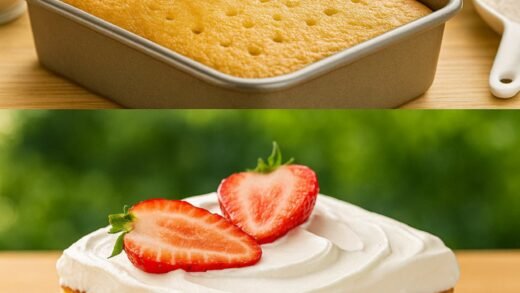
Fruit Garnish
-
Add fresh berries and mint leaves for color and freshness.
Other Options:
-
Shaved chocolate, chopped nuts, or cocoa dusting.
Serving Tips
-
Serve chilled for a firm, mousse-like texture.
-
Pair with vanilla ice cream or whipped cream.
-
Sprinkle a little cocoa powder for a café-style look.
Storage Recommendations
-
Refrigerate: Store in an airtight container or cover with plastic wrap. Keeps fresh for up to 5 days.
-
Freeze: Wrap individual slices in parchment paper and freeze for up to 2 months.
-
Thaw: Place in the refrigerator for a few hours before serving.
Nutrition (Per Serving)
-
Calories: 280
-
Protein: 4 g
-
Carbohydrates: 35 g
-
Fat: 14 g
-
Vitamin A: 8%
-
Calcium: 2%
-
Iron: 10%
Preparation Time
-
Prep time: 20 minutes
-
Chilling time: 4 hours
-
Total time: 4 hours 20 minutes
-
Serves: 8–10
Serving Suggestions
For a decadent dessert platter, try pairing this cake with:
-
A scoop of vanilla or coffee ice cream
-
Fresh berries for contrast
-
A drizzle of warm chocolate ganache
-
A cup of espresso or cold brew coffee
FAQs
1. What ingredients do I need for this recipe?
You’ll need milk, sugar, cocoa, cornstarch, chocolate, butter, and plain biscuits.
2. Can I substitute any ingredients?
Yes! Use graham crackers or vanilla wafers instead of biscuits, and swap regular milk for almond or coconut milk for a dairy-free version.
3. How long does it take to assemble?
Only about 20 minutes of prep time — then chill to set.
4. Can I make it in advance?
Absolutely! It’s perfect to prepare a day before serving — just keep it covered and refrigerated.