
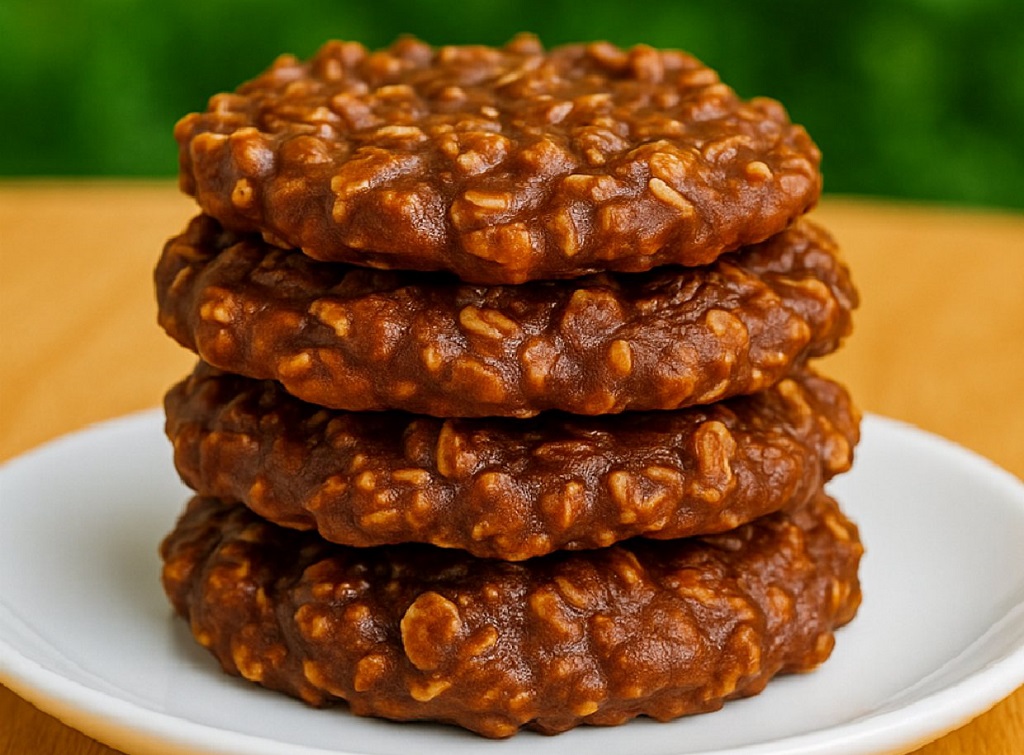
There’s something undeniably nostalgic about perfect no bake chocolate peanut butter cookies. They’re chewy, fudgy, rich, and come together in under 15 minutes no oven needed. I’ve made these for bake sales, midnight cravings, and even brunch tables, and they’re always the first to disappear.
The beauty of this cookie is in its simplicity just a handful of pantry ingredients and the right timing. But make no mistake, getting the texture just right takes a little know-how. That’s where I come in. Follow my tested method below and I promise you’ll never end up with a dry or runny batch again.
Ingredients for No Bake Chocolate Peanut Butter Cookies
- ½ cup (1 stick) unsalted butter
- 2 cups granulated sugar
- ½ cup whole milk
- 4 tablespoons unsweetened cocoa powder
- 1 cup creamy peanut butter (don’t use natural-style)
- 1 tablespoon vanilla extract
- 3 cups quick-cooking oats
- Pinch of salt
Step-by-Step Instructions
Step 1: Prep Your Setup
- Line two large baking sheets with parchment paper or silicone baking mats. Set aside.
- Measure out all your ingredients beforehand once the sugar mixture boils, you’ll need to work fast.
Step 2: Make the Chocolate Syrup Base
- In a medium saucepan, combine butter, sugar, milk, and cocoa powder. Place over medium heat and stir constantly until the butter melts and everything is blended.
- Increase heat to medium-high and bring the mixture to a rolling boil. This means large bubbles should appear across the entire surface.
- As soon as it reaches a full boil, set a timer and boil for exactly 60 seconds without stirring. This is the crucial part underboiling leads to runny cookies, overboiling makes them dry and crumbly.
Step 3: Stir in Peanut Butter and Oats
- Immediately remove the pan from heat. Stir in the peanut butter, vanilla extract, and a pinch of salt until completely smooth and glossy.
- Fold in the oats quickly but thoroughly. The mixture should be thick but scoopable.
Work fast once the oats are in, the mixture starts setting quickly. You want to scoop them before it cools too much and becomes difficult to handle.

How to Shape and Set No Bake Cookies
Scoop and Set the Cookies
- Using a cookie scoop or two spoons, quickly portion the warm mixture onto your prepared baking sheets. Flatten slightly with the back of the spoon if you want that classic round cookie shape.
- Leave a little space between cookies they won’t spread but it makes cleanup easier.
- Let them cool at room temperature for about 30-45 minutes. They’ll firm up as they sit.
If you’re in a hurry, pop the trays into the fridge for 15-20 minutes to speed things up. Just don’t store them in the fridge long-term that can make them too firm and dull the flavor.
Common Mistakes to Avoid
Even though this is a “no bake” cookie, don’t underestimate the science behind it. Here are some issues I’ve seen home bakers run into and how to avoid them:
- Runny cookies: This almost always means the sugar mixture wasn’t boiled long enough. You need exactly 60 seconds of full, rolling boil set a timer!
- Dry or crumbly cookies: You may have overboiled, added too much oats, or used a natural peanut butter that lacks stability. Stick with regular creamy peanut butter for best texture.
- Oats not binding well: Quick oats are crucial. Old-fashioned oats are too coarse and won’t hold together properly in this recipe.
Flavor Boosts and Custom Twists
Once you master the classic version of perfect no bake chocolate peanut butter cookies, you can have fun with variations. Here are a few that have earned five-star reviews from my kitchen:
- Sea salt sprinkle: Just after scooping, sprinkle each cookie with flaky sea salt for a sweet-salty combo that’s addictive.
- Add chopped peanuts: Stir ¼ cup of roasted, chopped peanuts into the warm oat mixture for crunch and depth.
- Espresso kick: Add ½ teaspoon instant espresso powder to the chocolate base it intensifies the cocoa and adds a subtle grown-up twist.
- Coconut variation: Replace 1 cup of oats with unsweetened shredded coconut for a chewy, tropical edge.
I’ve even tried sandwiching two of these cookies with a layer of peanut butter or Nutella in the center. Dangerous? Yes. Worth it? Every single bite.
When to Serve These Cookies
No bake cookies are ideal for busy days, summer parties when you don’t want to turn on the oven, or late-night cravings that need immediate satisfaction. They’re also fantastic as lunchbox treats or quick after-dinner sweets with coffee.
Because they’re so fast and freezer-friendly, I always make a double batch and store half for future snacking emergencies. Trust me future you will thank you.
Frequently Asked Questions About No Bake Chocolate Peanut Butter Cookies
Why won’t my no bake cookies harden?
If your cookies remain soft or gooey, it’s likely due to underboiling the sugar mixture. The syrup must reach a full rolling boil and stay there for exactly 60 seconds. Less time and the sugar won’t set properly.
Can I use natural peanut butter in this recipe?
It’s not recommended. Natural peanut butter tends to separate and lacks the stabilizers that help these cookies hold their shape. For best results, use a smooth, regular peanut butter like Jif or Skippy.
How long do no bake cookies last?
Stored in an airtight container at room temperature, these cookies stay fresh for up to 5 days. For longer storage, refrigerate them for up to 10 days or freeze for up to 2 months. Just bring them back to room temp before serving.
Can I make these cookies dairy free?
Yes! You can substitute the butter with vegan margarine and use plant-based milk like oat or almond. Just keep in mind that the flavor and texture might change slightly depending on the brand.
Are quick oats and old-fashioned oats the same?
No. Quick oats are finer and cook faster, which is essential for binding this recipe. Old-fashioned oats are thicker and will result in crumbly, loose cookies. Always use quick-cooking oats for no bake success.